Luma Fusion: the best edit platform for iPhone and iPad
- Guy Pelham
- Mar 1, 2019
- 8 min read
Luma Fusion is a terrific app and takes smartphone video editing to the next level. It has loads of features that you would normally find only on professional editing platforms. It's definitely a step up from iMovie!
This tutorial is based on an iPhone 8Plus, though Luma Fusion will work on any IOS device (not Android).
GETTING STARTED

Tap this icon to create a new project. Give your project a title.

You're then offered options to change your framerate. The higher the frame rate, the smoother your shots will be.
Normally the iPhone's own camera shoots at 30 frames per second. That's fine for social media or website work, but for TV in Europe (not the USA), you'll need 25fps. 24fps will give you a more cinematic look. Higher frames rates (eg 60fps) will give you much higher quality, but use up a lot more memory on your device.
It's normally a good idea to match the frame rate you've used in your camera...or work in multiples (eg, if you shoot in 30fps, you can edit in 60fps)

Here you can also change aspect ratio (they call it Frame Aspect), which includes landscape (16:9), vertical video (9:16) and square (1:1) for Instagram video. There are also other options (eg anamorphic)
CHOOSE SCREEN LAYOUT
Luma Fusion allows you to change the way you organise your screen, depending on the stage you've reached in your edit. You can do this at any time.

Tap this icon top right of screen.

The layout options appear on screen. For straightforward editing, I normally stick with the default option (top left)
AUDIO

Tap the audio bars icon left of screen to reveal the audio options. You can control up to six audio channels on Luma Fusion; three audio only and three sound-on-video, which gives you real freedom over your audio.

Tap the audio bars icon again, and the individual bars disappear, leaving just a simple, vertical, volume level slider (see below).
Tap again and it disappears altogether.

I like to leave the simple slider in place throughout the edit, so you can see your audio levels as you work.
TOOLBOX


The toolbox icon contains some of your most important controls, including Edit

Tap on Toolbox to reveal this range of options (left)
Edit allows you to split a clip
Detach allows you to split the audio away from your video, so you can work on it separately.
Unlink: normally your music track is linked to the main video, so it remains synched even if you are editing it. Tap Unlink to un-synch.
IMPORT YOUR MEDIA
Tap either of the icons indicated below. The Sources icon on the left gives you content on your smartphone (eg Photos for video clips or Luma Fusion sources such as Titles or Music). Click the right hand icon for external sources (eg iCloud Drive, Dropbox, Google Drive)


Tapping the left icon brings up sources on your smartphone, including:
Photos
WD (Luma Fusion has a tie-up with WD drives)
Imported
Storyblocks
Titles
Transitions
iTunes
Tap PHOTOS to get to the video on your smartphone. Tap Albums to access your video.

The right hand icon (top centre of screen) allows you to import content from a range of external sources, including:
iCloud Drive
Wireless/Network Drives
Dropbox
Box
Google Drive
OneDrive
iTunes File Share
Select the video clip you need and it appears in the preview window (below). You can play the clip and even do a rough pre-edit on it before importing it to the timeline by moving the blue pre-edit trim handles left or right.


Once you're happy, click this download icon and your clip drops onto the timeline. Once the clip is on the timeline, tap on it and it highlights in blue.
Drag the clip with your finger to elongate or stretch it, which makes precise editing easier.
Import your second clip. You can lift and drag the clip into a new position on the timeline, just like iMovie. Or you can lift it up onto higher level (the cutaway, or B roll level). See below.


This scissors icon allows you to cut the clip. Position the playhead (the blue vertical line) where you want the cut to happen and tap the scissors.
SHORTCUT TIP: tap your fingers either side of the blue playhead to create a cut (see below)

To delete part of a clip: move the playhead to the start of the section to be removed and tap scissors. Then move the playhead to the end of the clip to be removed, tap scissors again. The section to be deleted is now isolated from the rest of the video; tap to highlight it. Tap the trash icon (below L) to remove it


Back arrow: tap to undo any action
MORE EDITING OPTIONS

Highlight your clip by tapping it, tap the Toolbox icon and select Edit (left) from the options offered.
This opens a bigger edit preview window on the left of screen and offers you four edit groups:
Frame and Fit (cropping, flipping and camera 'moves')
Speed and Reverse (speed up or slow down motion via a slider)
Audio (adjust volume within a clip, audio ducking)
Color and Effects (colour and effects templates and sliders)

Frame & Fit (above) reveals a range of icons you can use to manipulate your clip.

The icons highlighted left allow you to:
Flip the image
Rotate the image
To move the image within the frame
Save as Presets
Above the icons, there are also a number of pre-loaded templates.
Use Size & Position (left) to rotate the image with your fingers - for example to correct the horizon in your shot.

Speed & Reverse (above) allows you to speed up or slow down your clip via the slider. Check the 'Maintain Audio Pitch' box to keep your audio at the original pitch and avoid it sounding like a demented chipmunk.

Audio allows you to vary the level of sound in a clip via a slider (above) There are a range of pre-set audio templates stored top right.

Color & Effects features a huge range of pre-loaded templates (above). Tap the range of icons above the templates to reveal the full range.

Insert icon: to insert a clip into the timeline. The rest of your video moves along to make room.
Tap to create override. This will replace the existing video rather than inserting
MUSIC

Tap Sources, and then Storyblocks -->Music. Luma Fusion has over 20 free tracks to choose from, plus some further paid-for tracks


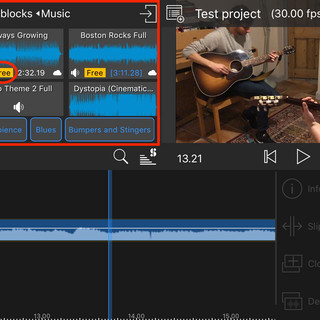


Tap to select the audio clip you want, it appears in the preview window (above right), so you can have a quick listen. Adjust the duration here by moving the blue handles.
Tap to download it to the timeline, where it appears as a green bar underneath your video timeline (below)

Click on the audio bars icon to control levels on your music track (as well as five other separate tracks - two more audio and three video)
VOICEOVER
Tap this icon to bring up the Add Clip menu selection (below left)

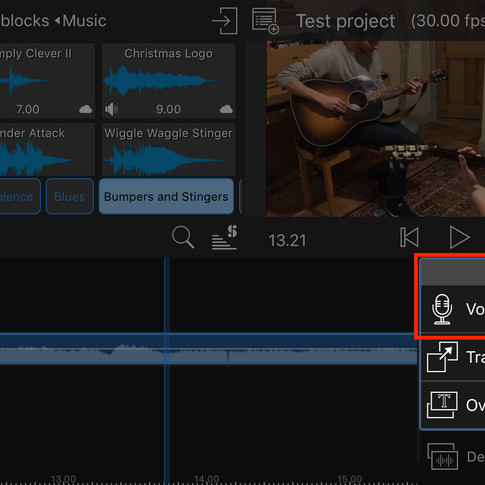

Select Voiceover and check your levels using the audio meters (above R). TIP: use an external microphone, NOT your iPhone's internal mic. Quality will be far better.


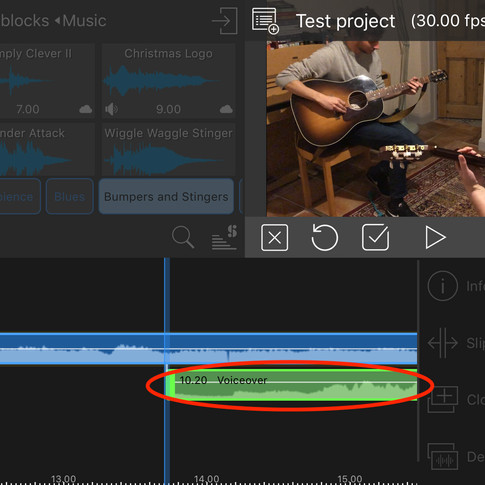
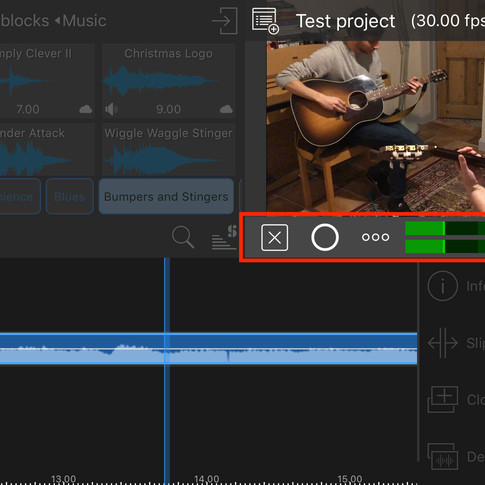
Tap the white circle when ready and a three second countdown appears (above L). As you speak, your voiceover appears as a red bar bottom of screen. Tap the blue button to stop. The voiceover then appears as a green bar (above R)
INSERT TITLES AND TEXT
Luma Fusion has a huge range of fonts, templates, shapes and styles
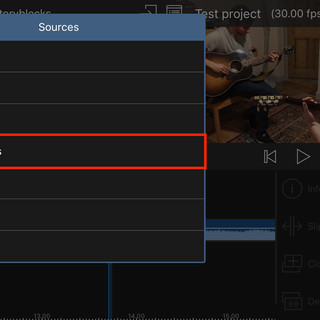
Tap Sources icon, (left) for all full set of templates (below left)


A selection of titles templates appears; tap to preview (above R)
Tap download to place your title on the timeline. Lift it up a level with your finger if you want it to appear superimposed on your video. Then tap Toolbox and tap Edit to bring up a full range of options.
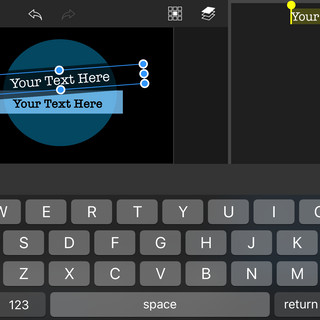
SHORTCUT TIP: simply double tap your Title as it sits on your timeline, then double tap on the text itself to bring up a keyboard and insert your own text.


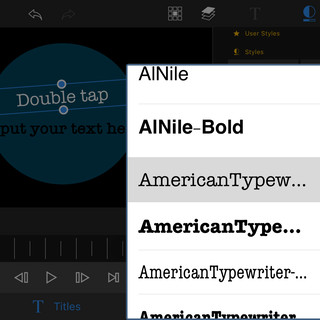

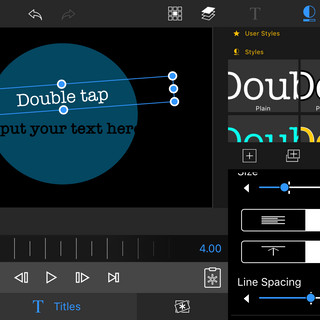
Find the different fonts available by tapping on your text, then scroll through the options right of screen. There is also a wide range of options for shapes, opacity, justification, borders, shadows etc.
For simpler text on screen, tap the cross icon to reveal Overlay Title, Your Text Here appears in the centre of screen. Drag it around with your finger to position.


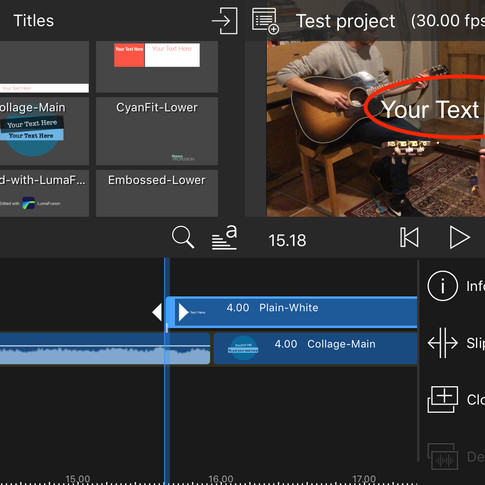
Tap Edit to bring up keyboard, font and colour options.
TRANSITIONS
Transitions are the effect that gets you from one clip of video to another.
Tap Sources then Transitions

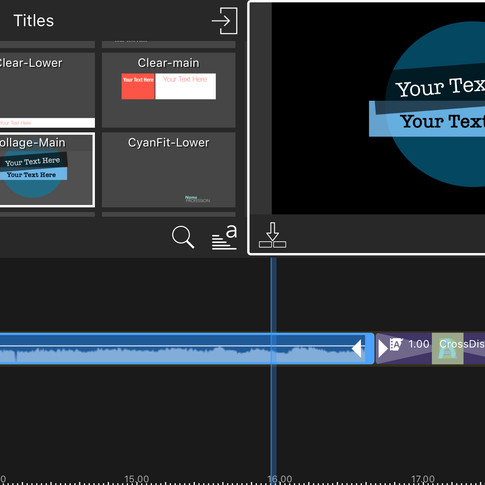
Tap any transitions template one to view the effect in the preview window (below)

If you're happy, drag the transition down to the timeline and drop it onto your cut (below).

EXPORT YOUR FINISHED VIDEO

Tap the export/share icon top of screen to reveal the Share menu: Movie, Audio Only, Project Archive and Snapshot.


Choose Movie and you get a huge drop down list inc Vimeo, YouTube, Dropbox, box, Google Drive etc.
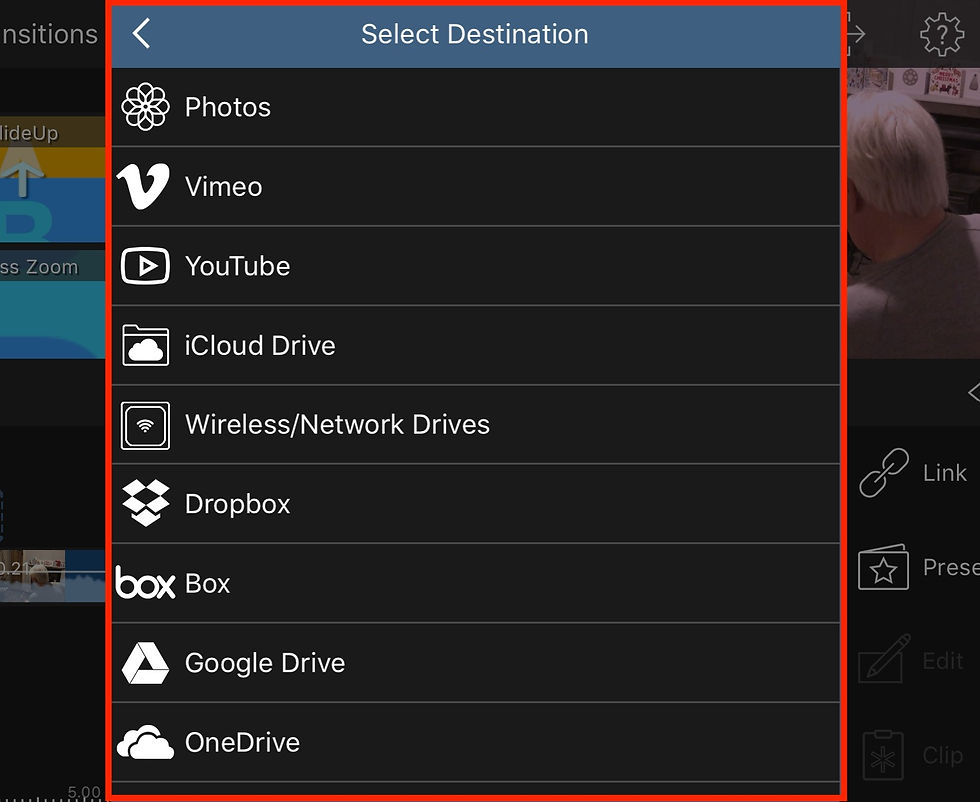
Choose Photos to save to your phone.
You then get another menu (below) offering a huge range of choices on resolution, frame rate, video quality…at the end it estimates the size of the file you are creating. Can even export as 360 video.

Tap the share icon again to export
TIP: make sure you maintain the same settings (eg 1080p 30fps) throughout the edit process, rather than chopping and changing.
ADVANCED EDITING OPTIONS
TO CREATE AN ANIMATION (really a digital move on your video)
This is a really clever effect, and allows you to create a virtual camera move on an otherwise static shot.
In this example (see pics below), we will create a slow zoom in on the left-hand guitar player.
Tap Toobox and Edit. The Size and Pos icon is revealed bottom left of screen

Decide where you want the move to start. Click on the cross + and it turns blue.


This inserts a key frame in the form of a blue circle or blob below the timeline (above R)

Scroll through your clip on to the point where you want the animation move to end. Click and click the blue X (see left) which inserts the second key frame


Then create the move - for example, a zoom in, with your fingers (above R). Rewind the clip and play to preview.

The blue key frame blobs mark the start and finish of your move
Don;t zoom in too much or you may degrade your video quality. Not a problem if you are dealing with 4K video though, as the video is of such high quality to start with, a zoom should still be at least HD

Luma Fusion has some preset animation moves, top right of screen.
AUDIO DUCKING
In multi-track editing, you may need to drop the audio on, say, a music track to allow the voiceover to be heard clearly.
There are two ways to achieve this.
METHOD ONE
Double tap your voiceover track and select Configuration. Make your voiceover track the Master, so this track drives the volume levels on other tracks (eg the music).


Return to your main edit and double tap on your Music track, select Configuration once again and select Auto. Voiceover now automatically takes priority over the music (nb you need to do this for each section of voiceover)


To alter the default ducking settings, tap the Help & Settings icon


Tap Project Settings (above L). In Current Project (R) move the Duck Volume to about -23dB, the Duck Threshold to infinity and the Duck Start and End Time to approx 0.15 seconds
METHOD TWO
This is a more precise method using key frames.
Double tap on the music track. and position the playhead where you want the volume level to drop.

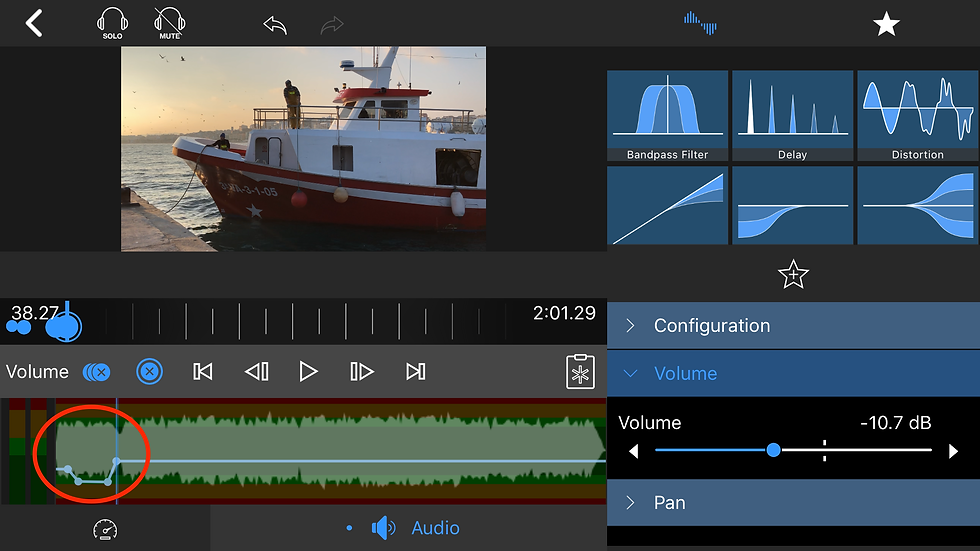
Tap this Volume icon, a blue blob appears on the timeline and a light blue dot appears on the audio level on your track (circled below). This is your first key frame.

Move the timeline forward a second or so, then adjust the volume downwards using the audio slider, right of screen. The more time you allow, the gentler the audio fade down will be (below).

Move to your outpoint, tap the Volume icon once again to insert a second key frame. Move the timeline forward slightly and then adjust the volume upwards using the slider (below)
Guy Pelham 2019
Comments